 Save to Pinterest
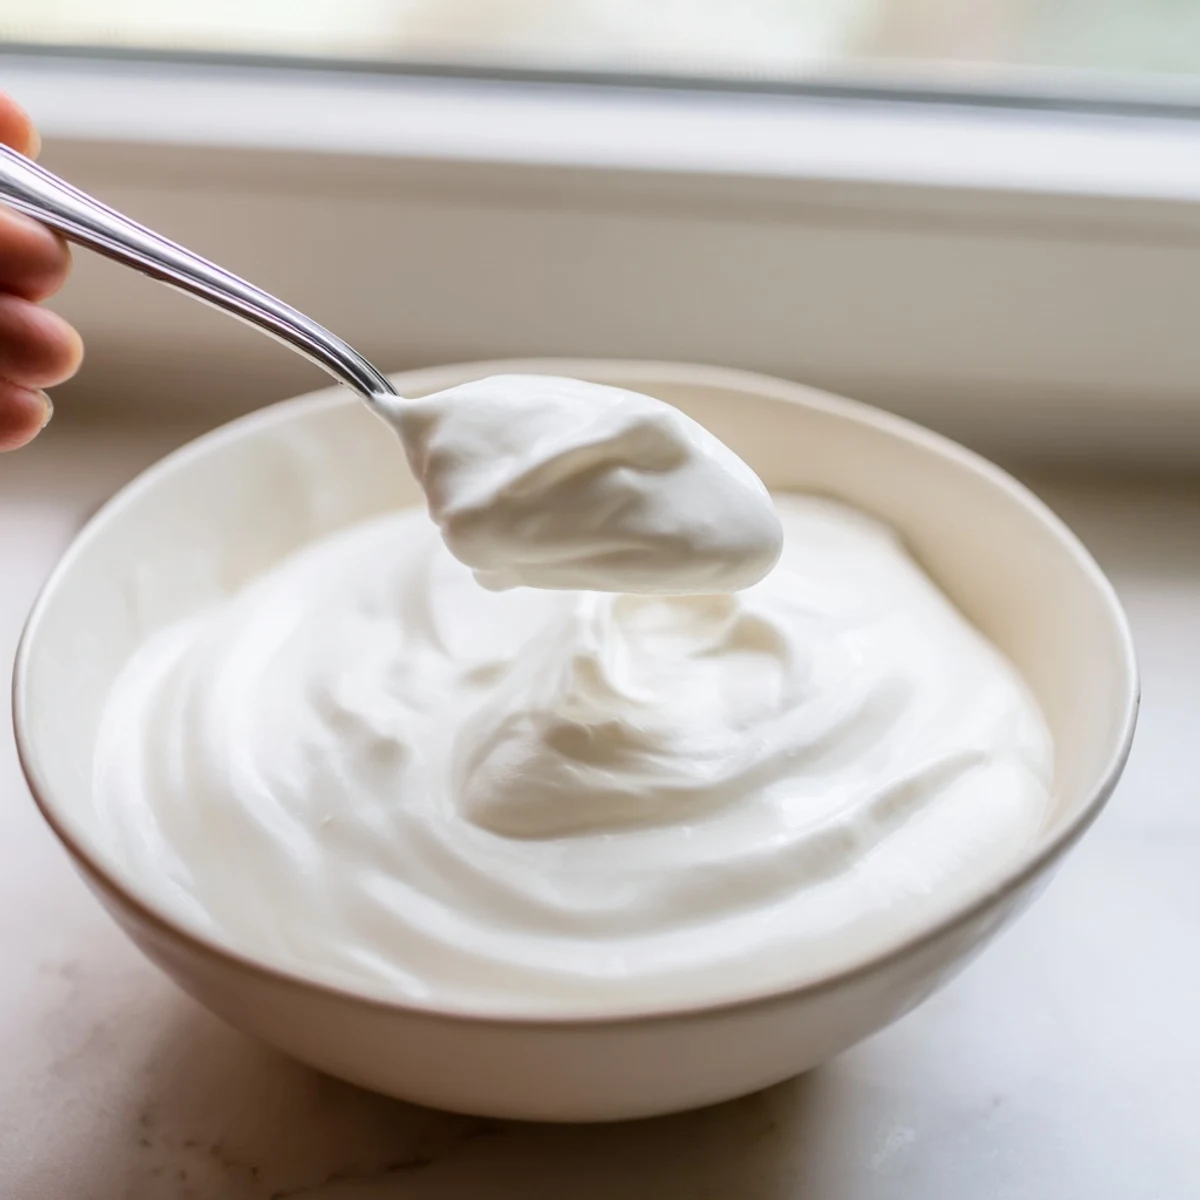
 Crafting authentic Greek yogurt at home requires only whole milk and a starter culture. The process involves heating milk to 180°F, cooling to 110°F, then culturing for 6-8 hours in a warm environment. The key step is straining through cheesecloth for 1-2 hours, which removes whey and creates that signature thick, creamy texture.
Perfect for meal prep, this versatile dairy staple keeps for weeks and costs significantly less than store-bought versions. Serve with fresh fruit, honey, and granola for breakfast, or use as a sour cream substitute in savory dishes.
My grandmother kept a thermometer in her apron pocket when making yogurt, treating the temperature readings like a secret code only she understood. Watching her transform plain milk into something thick and luxurious felt like witnessing alchemy in her tiny kitchen. That first spoonful of homemade yogurt, still warm from the culturing process, changed everything I thought I knew about this simple ingredient. Years later, I still make it the way she taught me, though I've learned a few tricks along the way.
Last summer, my youngest daughter helped me strain the yogurt, dipping her finger into the whey that collected beneath and declaring it tasted like sunshine. We ate bowl after bowl with fresh strawberries from the garden, and she asked if we could make yogurt together every single day. That afternoon in the kitchen, watching her discover the joy of making something with her own hands, reminded me why I fell in love with cooking in the first place.
Ingredients
- 1 liter whole milk: The higher fat content creates that luxurious Greek yogurt texture, and I've found ultra pasteurized milk doesn't set properly
- 2 tablespoons plain yogurt with live cultures: Your starter must contain active cultures, and I always save a bit from each batch to start the next one
Instructions
- Heat the milk:
- Warm your milk in a saucepan over medium heat, stirring occasionally to prevent scorching, until it reaches exactly 82°C (180°F)
- Cool to the perfect temperature:
- Remove from heat and let the milk cool down to 43°C (110°F), which feels comfortably warm to the touch like a baby bottle
- Prepare your starter:
- Whisk 2 tablespoons of the cooled milk with your yogurt starter in a small bowl until completely smooth
- Combine everything:
- Pour the starter mixture back into your cooled milk and stir gently but thoroughly
- Set up for culturing:
- Transfer to a clean container, cover it, and wrap in a towel or place in a yogurt maker to maintain warmth
- Let the magic happen:
- Leave it undisturbed in a warm spot for 6 to 8 hours until set like a gentle custard
- Strain for thickness:
- Line a strainer with cheesecloth, set it over a bowl, pour in the yogurt, and refrigerate for 1 to 2 hours until it reaches your desired consistency
- Store your creation:
- Transfer the thickened yogurt to a clean container and refrigerate until you're ready to enjoy it
 Save to Pinterest
 When I first started making yogurt for Sunday brunch, friends would look at me like I'd revealed a secret magic trick. Now they request it every time, gathering around the kitchen island with their own bowls of toppings, creating their perfect combinations. There's something deeply nourishing about serving food you've crafted with your own hands, watching people's faces light up with that first creamy spoonful.
Choosing Your Milk
While whole milk gives the richest results, I've experimented with everything from goat milk to sheep milk, each bringing its own subtle character to the final yogurt. The protein content affects the thickness, so don't be surprised if different milks yield slightly different textures. Fresh, high quality milk from a local farm makes a noticeable difference that will have you coming back for more.
The Straining Secret
The straining time is where you control the final consistency, and I've learned to check it every 30 minutes after the first hour. Too long and you'll end up with something closer to cheese, though that's delicious in its own right. The whey you collect is liquid gold, perfect for smoothies, baking, or even as a refreshing drink on its own.
Serving Ideas
A drizzle of honey and handful of toasted walnuts never fails to please, but don't stop there. I love layering it with granola and fresh berries for an instant breakfast parfait.
- Savory bowls with olive oil, zaatar, and cucumber make a stunning light dinner
- Swap it for sour cream in tacos or baked potatoes for a protein boost
- Blend it into smoothies for extra creaminess without the heavy feeling
 Save to Pinterest
 There's something profoundly satisfying about making your own yogurt, a connection to food traditions that stretch back thousands of years. Once you taste that first homemade spoonful, you'll understand why people have been making this simple transformation in kitchens across the Mediterranean for generations.
Recipe Q&A
- → What makes Greek yogurt different from regular yogurt?
-
Greek yogurt undergoes straining to remove whey, resulting in a thicker, creamier texture with nearly double the protein content of regular varieties. The straining process concentrates the milk solids while reducing liquid content.
- → How long does homemade Greek yogurt last?
-
Properly stored in an airtight container, homemade Greek yogurt keeps fresh for 2-3 weeks in the refrigerator. The natural live cultures continue to preserve the dairy, and the flavor may become slightly tangier over time.
- → Can I use low-fat milk instead of whole milk?
-
While possible, whole milk produces superior results with creamier texture and richer flavor. Low-fat versions yield thinner yogurt that requires longer straining time. For the best authentic Greek experience, stick with full-fat dairy.
- → What temperature is critical for culturing yogurt?
-
The milk must cool to exactly 43°C (110°F) before adding the starter culture. Higher temperatures kill beneficial bacteria, while cooler temperatures prevent proper fermentation. Maintaining this warm environment during culturing ensures thick, set results.
- → What can I do with the leftover whey?
-
Don't discard the nutrient-rich whey strained from your yogurt. Use it in smoothies for extra protein, substitute for buttermilk in baking, add to soup stocks for richness, or even feed to plants as a fertilizer supplement.